High Protein · Low Carb · Gluten Free
Pizza is one of those foods most people never actually want to give up, even when they are eating healthier.
The problem is that traditional pizza dough is loaded with refined carbs and very little protein, which means you are hungry again an hour later.
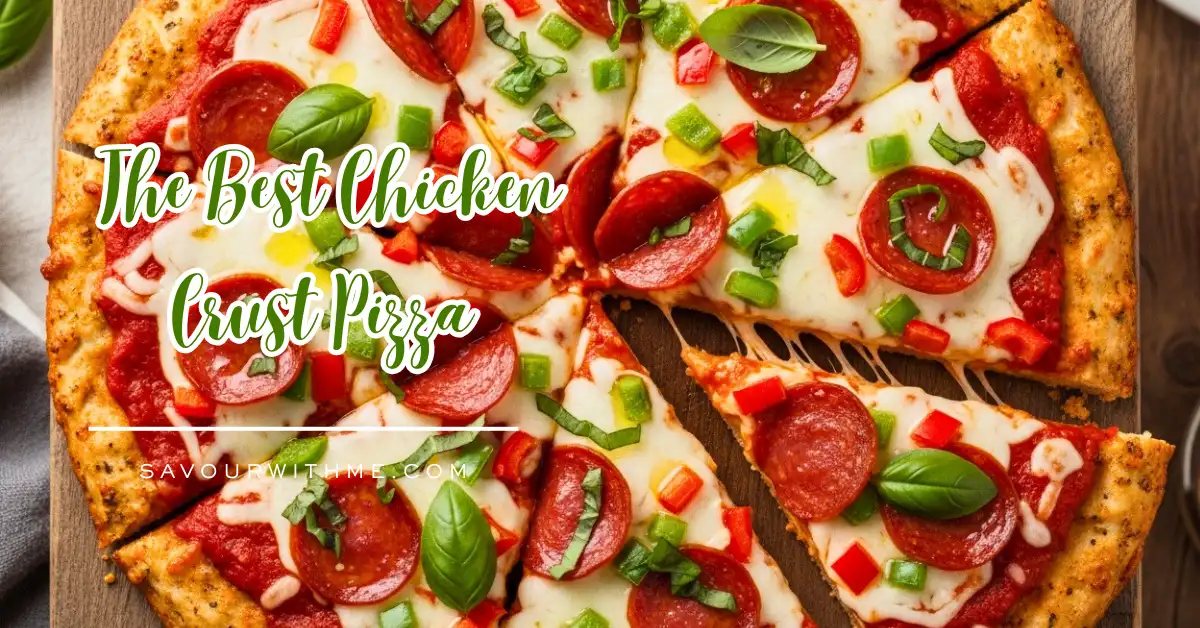
Chicken crust pizza flips that entirely. The crust itself is made from seasoned ground chicken, egg, and Parmesan cheese, baked into a golden, firm base that holds your toppings just like the real thing.
This recipe is genuinely one of the most satisfying low-carb meals you can put on the table.
It looks impressive, tastes incredible, and comes together in about 35 minutes from start to finish.
No yeast, no kneading, no rising time. Just mix, press, bake, and load it up.
Whether you are following a keto diet, trying to hit a higher protein goal, or just curious about a different kind of pizza night, this recipe delivers every single time.
Recipe at a Glance
| Detail | Info | Notes |
|---|---|---|
| Prep Time | 10 minutes | Mix and shape the crust |
| Cook Time | 33 minutes | 25 min par-bake + 8 min topping bake |
| Total Time | 43 minutes | Start to finish |
| Servings | 4 people | About 2 slices per person |
| Calories | ~340 per serving | With standard toppings |
| Protein | ~36g per serving | From chicken, egg, and Parmesan |
| Diet | Keto / Low-Carb | Gluten free, grain free |
| Skill Level | Easy | Beginner friendly, no special tools needed |
What Makes This Chicken Crust Pizza Recipe the Best?
The crust actually holds together. Many chicken crust recipes end up soggy or fall apart the moment you try to pick up a slice.
This version uses the right ratio of egg to chicken to Parmesan, which creates a firm, sliceable crust with golden edges that you can genuinely pick up with your hands.
The chicken flavor disappears into the crust. This surprises people every single time.
Ground chicken is naturally very mild, and once it is seasoned with garlic powder, Italian seasoning, and Parmesan, it tastes like a thick, cheesy crust rather than a piece of chicken.
Most guests would never guess what they are eating until you tell them.
Spreading it thin is the secret. A thinner crust bakes more evenly, crisps better at the edges, and holds toppings without turning soggy in the middle.
Aim for about a quarter inch thick and use damp hands or the back of a spoon to smooth it out on the parchment paper before it goes into the oven.
Par-baking is non-negotiable. Baking the crust fully before adding any sauce or toppings is what separates a sturdy result from a wet, collapsed one.
The crust needs to cook all the way through and develop a light seal on the surface so that the sauce does not soak straight in.
Do not skip this step, and let it rest for at least five minutes before loading it up.
It packs real nutrition. Each serving delivers around 36 grams of protein with very few carbs, making it one of the most genuinely satisfying pizza alternatives out there.
You get the comfort of pizza night without the carb crash afterward.
I first tried this on a Tuesday night when I had ground chicken to use up and nothing else planned. I was skeptical but desperate.
Quick Stats Table
| Prep Time | 10 minutes |
| Cook Time | 33 minutes |
| Total Time | 43 minutes |
| Servings | 4 people |
| Calories | Approx. 340 per serving |
Ingredients
For the Crust
| Quantity | Ingredient | Notes |
|---|---|---|
| 1 lb (450g) | Ground chicken | 90/10 lean is ideal, not ultra-lean |
| 1 large | Egg | Binds the crust so it holds together |
| 1/2 cup | Parmesan cheese, finely grated | Adds savory flavor and helps crisp the edges |
| 1 tsp | Garlic powder | |
| 1 tsp | Italian seasoning | |
| 1/2 tsp | Kosher salt | |
| 1/4 tsp | Black pepper |
For the Toppings
| Quantity | Ingredient | Notes |
|---|---|---|
| 1/3 cup | Pizza sauce or marinara | Do not over-sauce the crust |
| 1 cup | Shredded mozzarella | Low-moisture, part-skim works best |
| 1/4 cup | Parmesan cheese | For finishing on top |
| To taste | Your favorite toppings | Pepperoni, bell peppers, olives, fresh basil,tomatoes |
Instructions
1. Preheat the Oven to 400 F (200 C)
Line a large baking sheet or pizza pan with parchment paper and set it aside.
Parchment paper is important here since the chicken mixture will stick to an unlined pan and make cleanup a nightmare.
2. Mix the Crust Ingredients
Add the ground chicken, egg, Parmesan, garlic powder, Italian seasoning, salt, and pepper to a large bowl.
Mix everything together thoroughly until the seasoning is evenly distributed and the mixture looks uniform.
It will be a little sticky and that is completely normal.
3. Shape the Crust
Transfer the chicken mixture onto the prepared baking sheet and press it into a thin, even circle or rectangle roughly 10 to 12 inches across.
Aim for about a quarter inch thickness throughout.
Use damp hands or the back of a wet spoon to smooth the edges and keep the thickness consistent, since thicker spots will cook unevenly.
4. Par-Bake the Crust for 22 to 25 Minutes
Bake until the top looks golden and set at the edges and the crust is fully cooked through.
If it still looks wet in the center after 22 minutes, give it a few more minutes. This is the most important step so do not rush it.
5. Rest the Crust for 5 Minutes
Remove it from the oven and let it sit before adding toppings.
This resting period allows the crust to firm up and form a light seal on the surface so the sauce does not turn the base soggy.
6. Increase Oven to 425 F (220 C) and Add Toppings
Spread the pizza sauce evenly over the rested crust, leaving a small border around the edges.
Layer on the mozzarella, Parmesan, and any other toppings you like.
Go light on the toppings since the crust is firmer than traditional dough but can still get weighed down.
7. Bake for 8 to 10 Minutes
Bake until the cheese is fully melted and bubbling.
For extra golden color on top, switch the oven to broil for the final 1 to 2 minutes and watch it closely so the cheese does not burn.
8. Slice and Serve
Let the pizza rest for 3 minutes before slicing.
This gives the cheese and toppings time to settle so they do not slide off when you cut.
Top with fresh basil, crushed red pepper, or a drizzle of hot honey if you like, and enjoy immediately.
Pro Tips for the Best Results
- Always use parchment paper. The chicken will stick to an unlined pan and the crust will break apart when you try to lift it.
- Spread the crust thinner if you want crispier edges. Thin means better texture and a faster bake.
- Do not skip the rest time between the two bakes. It is what prevents a soggy crust.
- Go light on the sauce. Too much sauce adds moisture that the chicken crust cannot handle the way flour dough can.
- Use a spatula to check the underside before removing from the oven. It should be golden and firm, not pale and soft.
Serving Suggestions
Chicken crust pizza is delicious straight out of the oven, but pairing it with the right sides and finishing touches makes it feel like a full, satisfying meal.
- Serve alongside a simple arugula salad dressed with lemon and olive oil for a light, fresh contrast to the rich, cheesy pizza.
- A Caesar salad with light dressing pairs beautifully and keeps the meal low-carb from start to finish.
- Finish with a drizzle of hot honey over the top right before serving for a sweet, spicy kick that elevates the whole pizza.
- Scatter fresh basil leaves and a pinch of crushed red pepper flakes over the cheese the moment it comes out of the oven.
- Cut into smaller squares and serve as a party appetizer or game-day snack. It holds its shape well and is easy to pick up.
- Serve with a side of extra marinara or ranch dressing for dipping. Kids especially love having a dipping sauce alongside.
- Pair with roasted vegetables like zucchini, asparagus, or cherry tomatoes for a complete, colorful dinner plate.
Making Chicken Crust Pizza Ahead and Storing
Refrigerator
- Store leftover slices in an airtight container in the fridge for up to 4 days.
- Place a small piece of parchment paper between slices so they do not stick together.
- To reheat, place slices directly on a baking sheet and bake at 425 F for about 10 minutes. This brings the crust back to life much better than a microwave, which will make it soft and a bit rubbery.
Freezer
- You can freeze the fully baked crust (with or without toppings) for up to 2 months.
- Let the pizza cool completely on a wire rack first, then freeze it flat on a baking sheet for 30 minutes before wrapping tightly in plastic wrap.
- To reheat from frozen, unwrap and place on parchment-lined baking sheet. Bake at 400 F for 10 to 15 minutes until heated through.
- For meal prep, pre-bake the crust only and freeze it plain. When you are ready to eat, add fresh sauce and toppings and bake as directed.
I like to make two crusts at once on the weekend and freeze one plain. On a busy Wednesday night, pulling out a pre-baked crust and loading it up with toppings means dinner is on the table in under 15 minutes. It is one of the better meal prep tricks in my rotation.
Variations to Try
The base recipe is endlessly flexible. Once you have made it once, you will start seeing how easy it is to change things up based on what you have in the fridge or what mood you are in.
- Ground turkey crustworks as a direct swap for the ground chicken and has a very similar texture and flavor profile.
- Canned chickencan be used in a pinch. Drain it very well, then pulse it briefly in a food processor before mixing with the other ingredients.
- Shredded rotisserie chickenmakes a slightly chewier crust. Pulse it in a food processor first to break it down and add 1 to 2 tablespoons of mayonnaise to help bind it.
- BBQ chicken pizzauses BBQ sauce instead of marinara, topped with mozzarella, red onion, and cooked shredded chicken.
- Margherita stylekeeps it simple with a thin layer of marinara, fresh mozzarella, and basil leaves added right after baking.
- White pizzaskips the tomato sauce entirely and uses a garlic olive oil base with ricotta, mozzarella, and spinach.
- Veggie loadedtops the crust with roasted bell peppers, mushrooms, zucchini, and olives for a colorful, plant-forward option.
- Add cottage cheese to the crustinstead of Parmesan to boost the protein even higher and keep the middle of the crust tender and chewy.
Frequently Asked Questions
Why is my chicken crust pizza soggy in the middle?
The most common reason is that the crust was not spread thin enough or not fully par-baked before adding toppings.
Make sure your crust is no thicker than a quarter inch before it goes into the oven, bake it completely until golden and set, and always let it rest for 5 minutes before adding sauce.
Using too much sauce is the other main culprit, so keep the sauce layer thin.
Can I taste the chicken in the crust?
Surprisingly, no. Ground chicken has a very mild flavor, and once it is mixed with Parmesan, garlic powder, and Italian seasoning and baked, it tastes like a thick, seasoned cheesy crust.
Most people genuinely cannot tell it is chicken unless you tell them.
The Parmesan does a lot of the flavor work here.
Can I make the crust ahead of time?
Yes, and it works really well for meal prep. Par-bake the crust fully, let it cool completely, and then refrigerate it for up to 2 days or freeze it for up to 2 months.
When you are ready to eat, add your toppings and bake at 425 F for 8 to 10 minutes straight from the fridge, or 10 to 15 minutes from frozen.
How do I keep the crust from sticking to the pan?
Always use parchment paper. This is not optional.
The chicken mixture is sticky and will bond to an unlined pan, and trying to remove it will break the crust apart.
A baking sheet lined with parchment paper is the easiest and most reliable method.
You can also lightly spray the parchment with cooking spray for extra insurance.
Pizza Night Just Got a Whole Lot Better
Chicken crust pizza is proof that eating well does not mean giving up the foods you love.
With just a handful of ingredients and less than 45 minutes, you can have a high-protein, low-carb pizza that is genuinely satisfying from the first slice to the last.
The crust holds together, the flavor is there, and the toppings are completely up to you.
Make it once and it will earn a permanent spot in your weekly dinner rotation.
Your future self, holding a proper pizza slice with zero guilt, will thank you.

Chicken Crust Pizza
Ingredients
Equipment
Method
- Preheat oven to 400 F (200 C) and line a baking sheet with parchment paper.
- Combine ground chicken, egg, Parmesan, garlic powder, Italian seasoning, salt, and pepper in a large bowl and mix until fully combined.
- Transfer mixture to the prepared baking sheet and press into a thin, even circle or rectangle about 10 to 12 inches wide and 1/4 inch thick.
- Bake for 22 to 25 minutes until golden and fully cooked through. Rest for 5 minutes.
- Increase oven to 425 F (220 C). Spread sauce thinly over the crust, add mozzarella, Parmesan, and remaining toppings.
- Bake for 8 to 10 minutes until cheese is melted and bubbly. Broil for 1 to 2 minutes for extra color if desired.
- Rest for 3 minutes, slice, and serve immediately.
Notes
- Do not use ultra-lean ground chicken breast as it dries out during baking. A 90/10 blend keeps the crust juicy.
- Parchment paper is required. The mixture will stick to an unlined pan.
- Thinner crust equals crispier edges. Spread it as evenly as possible.
- The par-bake and rest period before topping is the key to avoiding a soggy base.
- Store leftovers in the fridge for up to 4 days or freeze for up to 2 months.
- Reheat in the oven at 425 F for best texture. Microwave works but softens the crust.
About The Author