
There’s something magical about coming home to a house that smells like simmering chili.
I still remember the first time I made crockpot chili on a whim before heading out for a Saturday of errands.
When I walked back through the door six hours later, my apartment smelled so incredible that my neighbor actually knocked to ask what I was cooking.
That’s the power of a good slow cooker chili, and I’m going to show you exactly how to make it.
What Makes This Crockpot Chili the Best?
This recipe stands out for three key reasons.
First, we brown the meat before it goes into the crockpot. Those ten extra minutes create a depth of flavor through caramelization that you simply can’t get otherwise.
Second, we use a blend of spices including cumin, paprika, and even a touch of cocoa powder for layers of flavor instead of that one-note taste.
Third, the long, slow cooking time allows everything to meld together beautifully, creating a chili that tastes even better the next day.
Quick Stats Table
| Prep Time | Cook Time | Servings | Calories per Serving |
|---|---|---|---|
| 15 minutes | 6-8 hours | 8 | 380 |
Ingredients
For the Chili:
- 2 pounds ground beef (or ground turkey for a lighter option)
- 1 large onion, diced
- 4 cloves garlic, minced
- 2 cans (15 oz each) kidney beans, drained and rinsed
- 1 can (15 oz) black beans, drained and rinsed
- 1 can (28 oz) crushed tomatoes
- 1 can (15 oz) diced tomatoes with their juice
- 1 cup beef broth
- 2 tablespoons tomato paste
- 2 tablespoons chili powder
- 1 tablespoon cumin
- 1 tablespoon paprika
- 1 teaspoon cocoa powder
- 1 teaspoon oregano
- 1/2 teaspoon cayenne pepper (adjust to taste)
- 2 teaspoons salt
- 1 teaspoon black pepper
- 1 tablespoon olive oil
For Serving:
- Shredded cheddar cheese
- Sour cream
- Chopped green onions
- Jalepeno
- Corn chips or crackers (optional)
- Fresh cilantro (optional)

Instructions
Let’s walk through this step by step. Don’t worry, it’s easier than it looks.
Step 1: Brown the Meat
Heat the olive oil in a large skillet over medium-high heat. Add the ground beef and break it up with a wooden spoon. Let it brown for about 5-7 minutes, stirring occasionally. You want to see some nice caramelization happening. This is where the flavor starts building, so don’t rush it. Once the meat is browned, drain off most of the excess fat, leaving just a tablespoon or so in the pan.
Step 2: Sauté the Aromatics
Add the diced onion to the same skillet with the meat. Cook for about 3 minutes until the onion starts to soften. Then add the minced garlic and cook for another minute. Your kitchen should smell amazing right about now. This is also a good time to add the tomato paste and stir it around for a minute. It’ll deepen the tomato flavor in your final chili.
Step 3: Add Everything to the Crockpot
Transfer the meat mixture to your crockpot. Add all the beans, crushed tomatoes, diced tomatoes, and beef broth. Then add all your spices: chili powder, cumin, paprika, cocoa powder, oregano, cayenne, salt, and pepper. Give everything a good stir to combine. I learned the hard way that if you don’t stir well at this stage, you might end up with pockets of intense spice in some bites and bland spots in others.
Step 4: Set It and (Almost) Forget It
Cover your crockpot and cook on low for 6-8 hours or on high for 3-4 hours. The low and slow method is definitely better if you have the time. It allows the flavors to develop more fully and the beans to become perfectly tender without getting mushy.
About an hour before serving, give it a taste and adjust the seasonings if needed. Sometimes I add a bit more salt or a splash of hot sauce if I want more heat. This is your chili, so make it work for you.
Step 5: Serve and Enjoy
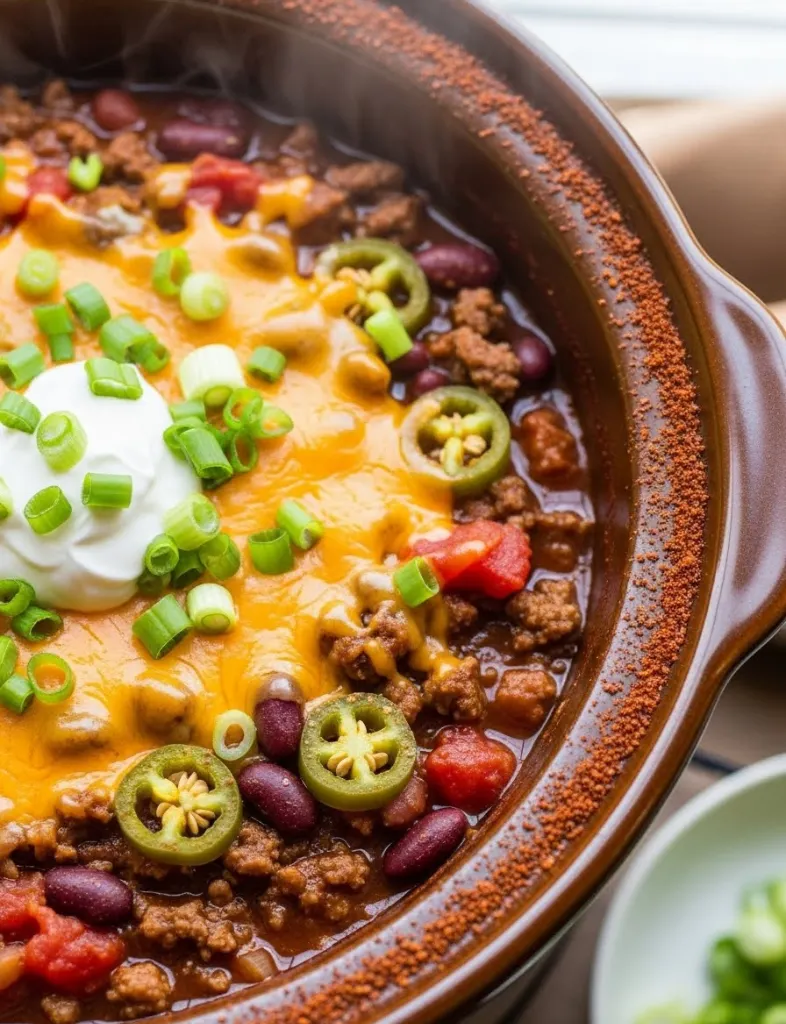
Ladle the chili into bowls and set out all your toppings. I love loading mine up with shredded cheese, a dollop of sour cream, and plenty of green onions. My husband prefers his with crushed corn chips mixed right in, which adds a great crunch. There’s no wrong way to top your chili.
Making Crockpot Chili Ahead (Storage Tips)
This chili keeps beautifully and actually tastes better on day two.
Store leftovers in airtight containers in the fridge for up to 5 days, or freeze for up to 3 months. I like to portion it into individual servings for easy lunches during the week.
For meal prep, you can brown the meat and sauté the aromatics the night before, then refrigerate everything. In the morning, just add everything to the crockpot and turn it on before heading out. Dinner will be ready when you get home.
If freezing, slightly undercook the beans so they don’t get mushy when reheated. Thaw overnight in the fridge, then reheat on the stovetop or in the microwave.

Variations
Once you’ve mastered this base recipe, try these popular variations:
- White Chicken Chili: Use 2 pounds chicken breasts (no browning needed), white beans instead of kidney and black beans, chicken broth instead of crushed tomatoes, and add a can of diced green chiles.
- Vegetarian Chili: Skip the meat, double the beans, and add diced bell pepper, corn, and a diced sweet potato for heartiness. Use vegetable broth.
- Spicy Three-Alarm Chili: Increase cayenne to 1 teaspoon, add 1-2 diced jalapeños, and include a tablespoon of hot sauce.
- Texas-Style Chili: Skip the beans entirely, increase meat to 3 pounds, and add an extra can of diced tomatoes.
- Cincinnati-Style Chili: Add cinnamon and allspice, increase the cocoa powder, and serve over spaghetti topped with cheese, onions, and beans.
Conclusion
Making crockpot chili has become one of my favorite cold-weather traditions.
There’s something deeply satisfying about minimal morning effort resulting in a complete, delicious meal that tastes like you spent all day cooking.
Once you make this a few times, you’ll develop your own tweaks and preferences, and that’s the joy of cooking.
So grab your crockpot and give this recipe a try.
Whether you’re feeding a crowd, meal prepping for the week, or just want a cozy dinner on a cold night, this chili has you covered. Happy cooking!
About The Author